VCF Installer Deployment
Deploying VMware Cloud Foundation (VCF) is the foundational step for building your private cloud infrastructure. This first part of our series will walk through the prerequisites and the step-by-step process for deploying the VCF Installer appliance.
Prerequisites and Preparation
Before starting the deployment, ensure all prerequisites are met. A successful deployment hinges on meticulous preparation.
Required Resources
| Component | Minimum Specification | Notes |
|---|---|---|
| Compute | 8 vCPUs | Standard requirements for the Installer VM. |
| Memory | 18 GB RAM | Essential for smooth operation during deployment. |
| Storage | 300 GB Thin Provisioned | Sufficient space for the appliance OS and deployment files. |
| Network | Management Network Access | The Installer VM must be able to reach ESXi hosts, vCenter, and DNS/NTP services. |
Networking Details
Ensure you have the necessary IP address and hostnames reserved for the VCF Installer. In mycase we are deploying VCF Installer on one of the management esxi host. Later it will be converted as SDDC Manager. If you are deploying VCF Installer externally you will need separate DNS entry for VCF Installer.Before deployment, confirm that the required IP addresses and hostnames for the VCF Installer are reserved.
If the VCF Installer is being deployed on an existing management ESXi host (as in this case), it will later be converted into the SDDC Manager. Separate DNS entries will be needed if the VCF Installer is deployed externally.
Step-by-Step Deployment Guide
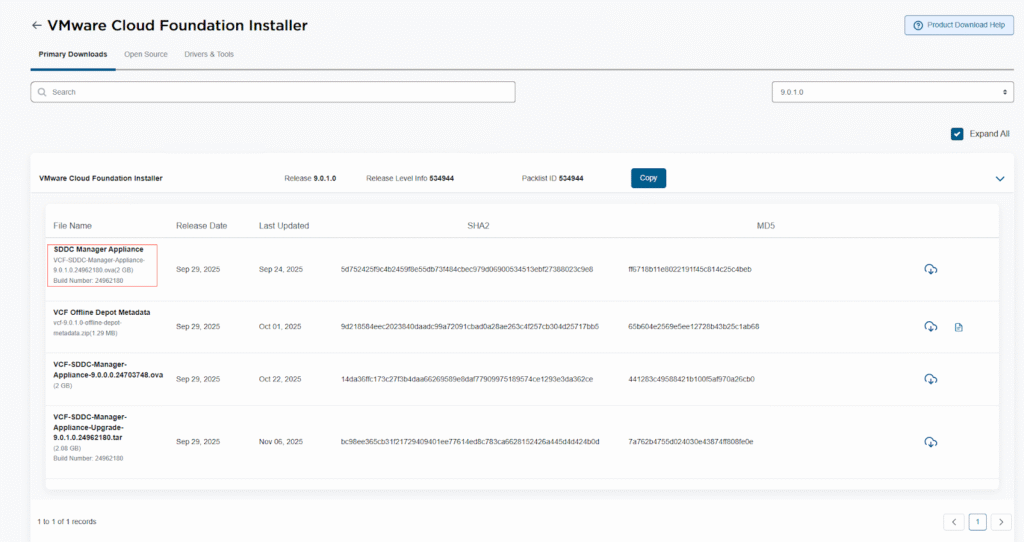
1. Download and Verify the VCF Installer OVA
The first action is to download the VCF Installer OVA file from the VMware Customer Connect portal.
- Download the vcf-installer-9.0.1.0-xxxxxx.ova file.
- Verify the SHA256 checksum to ensure file integrity.
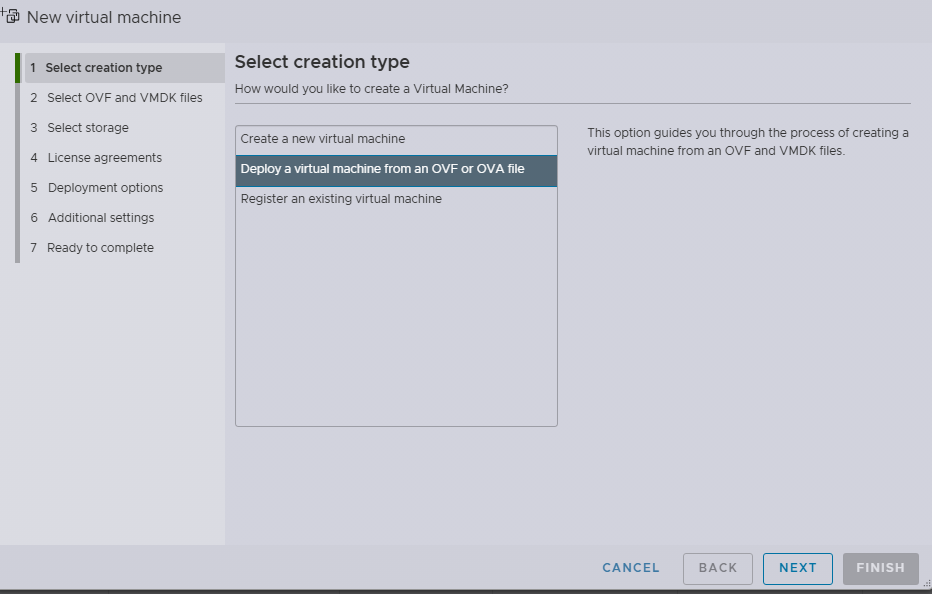
2. Deploy the OVA via vCenter Server/ESX Client
Use the standard “Deploy OVF Template” wizard in your existing vCenter Server environment or ESX client.
- Select template: Choose the downloaded VCF Installer OVA.
- Select name and folder: Provide a meaningful name (e.g., vcf-installer) and select the appropriate VM folder.
- Select compute resource: Choose the cluster or host where the Installer VM will reside.
- Review details: Confirm the details of the OVA.


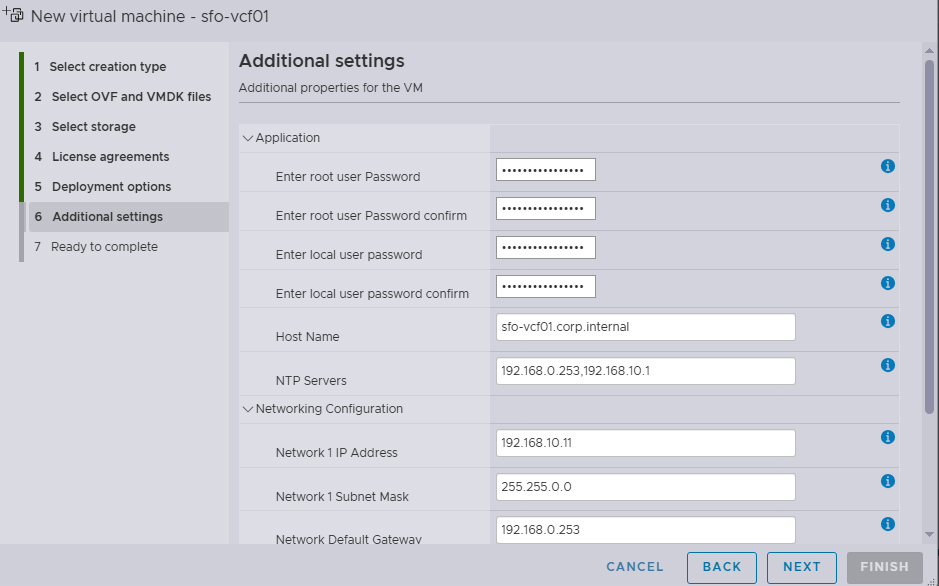
3. Customize Template
This is the critical step where you configure the network settings for the VCF Installer appliance.
- Set Network Properties:
- Network Selection: Choose the management network port group.
- IP Allocation: Select static IP allocation.
- IP Address: Enter the reserved IP address (e.g., 10.10.10.20).
- Netmask and Gateway: Configure the correct subnet mask and default gateway.
- DNS Servers: Enter the primary and secondary DNS server IP addresses.
- NTP Servers: Enter the NTP server addresses.
- Hostname: Enter the FQDN for the installer (e.g., vcf-installer.domain.local).
- Set Password: Configure the initial root and admin password for the appliance.
4. Finalize and Power On
- Review settings: Ensure all configuration settings are correct.
- Finish: Click Finish to start the OVA deployment.

Post-Deployment Verification
After the Installer VM is running, perform basic connectivity checks.
- Console Login: Access the VCF Installer VM console and log in as root.
- Network Test: Ping the default gateway, DNS servers, and one of your target ESXi hosts to confirm network access.
- Web Access: Attempt to access the VCF Installer UI via a web browser using the IP address or FQDN:
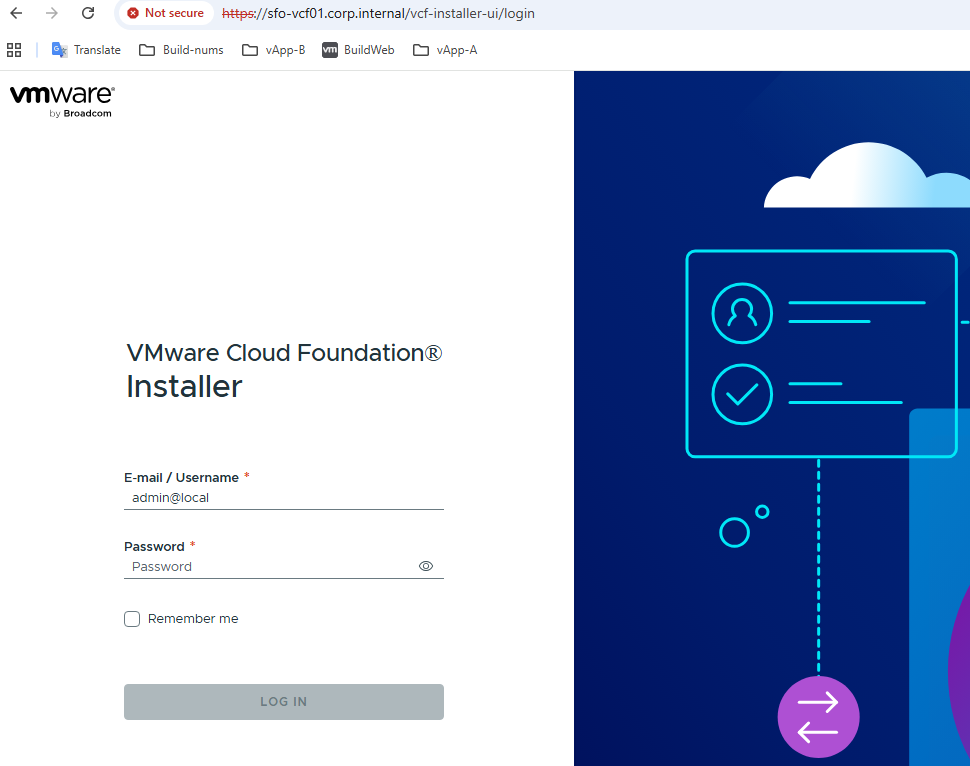
If the web UI loads, you have successfully deployed the VCF Installer appliance! In Part 2, we will cover the initial configuration and VCF Bring-Up process.
One thought on “VCF 9.0.1 Deployment Series – Part 1 – Deploying VCF Installer”