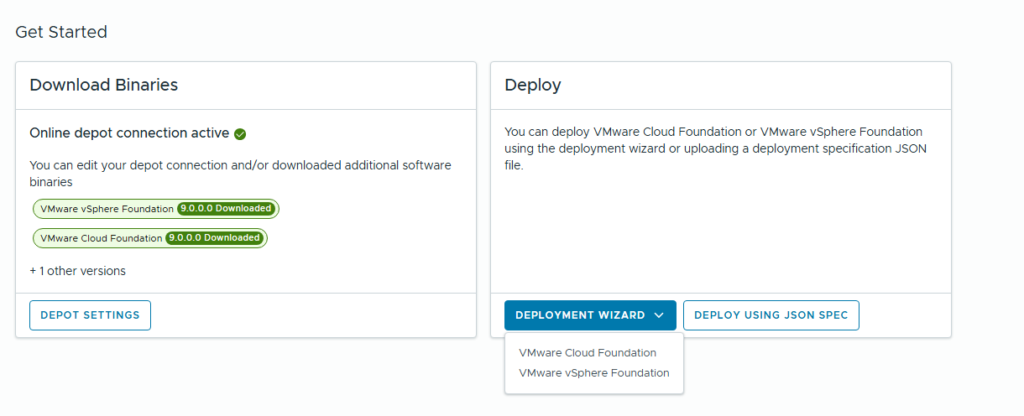
Following our previous post on configuring the VCF Installer and downloading binaries, this guide will walk you through the steps for deploying VCF 9.
Before starting the deployment wizard, ensure the following are complete:
- ESXi Hosts Prepared: ESXi hosts must be provisioned with the ESX 9 image.
- Minimum Host Requirements:
- 2 Hosts: Required for FC or NFS storage. NSX and Fleet Components (VCF Operations & Automation) will be deployed as a single node.
- 3 Hosts: Required for vSAN storage. NSX and Fleet Components will still be deployed as a single node.
- 4 Hosts: Required for high availability (HA) deployment of NSX and Fleet Components, regardless of the storage type.
- Minimum Host Requirements:
- Planning & Preparation Complete: The Planning and Preparation book must be fully filled out, with all necessary IPs reserved and corresponding DNS entries created.
- Port Configuration: All required ports must be opened as specified in the ports and protocols documentation.
VCF Deployment Steps
The deployment process is guided through the VCF Installer UI:
- Launch the Wizard: Open the VCF Installer UI and select “VMware Cloud Foundation” under the deployment wizard.
- Select Deployment Type:
- Choose “New VCF fleet.”
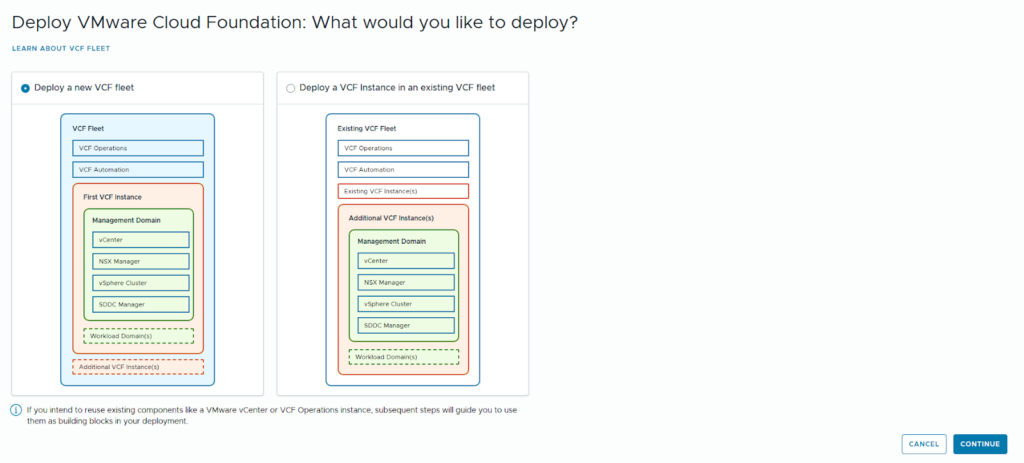
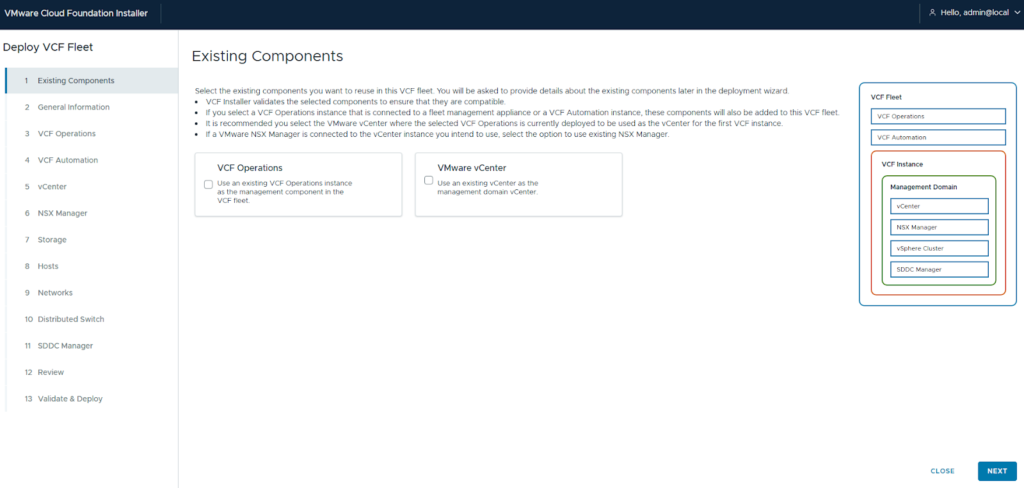
- If converging an existing environment, you would select vCenter or VCF Operations; however, for this greenfield deployment, we proceed without selecting anything.
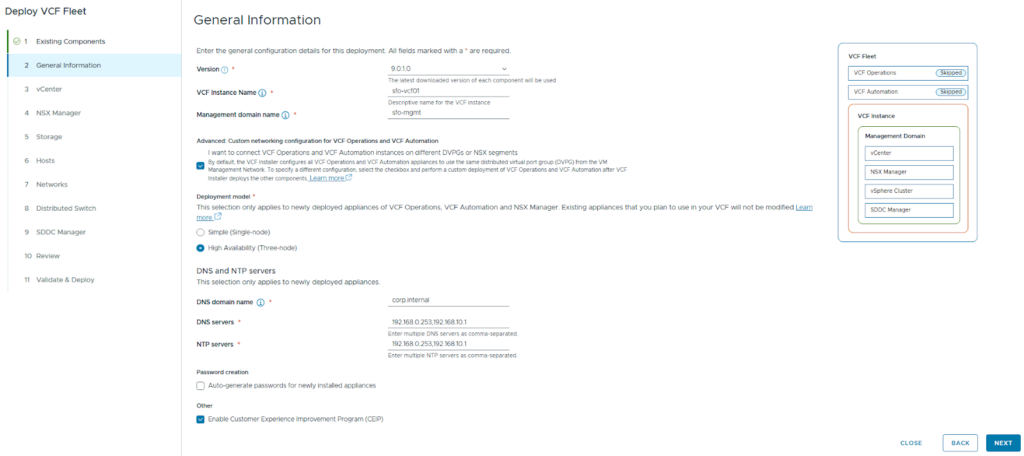
- Deployment Footprint: Select the desired deployment size:
- We are deploying in High Availability (HA).
- For minimal footprint or lab purposes, you may select “single node.”
- Networking: We are placing Fleet Components on a separate network and have selected “custom networking.”
- If planning to use the same management network for Fleet Components, this option can be left unchecked.
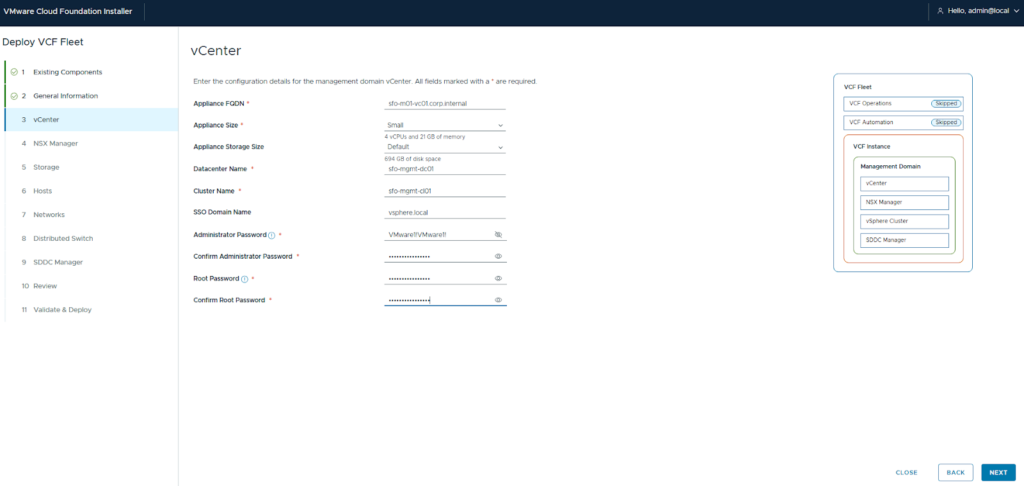
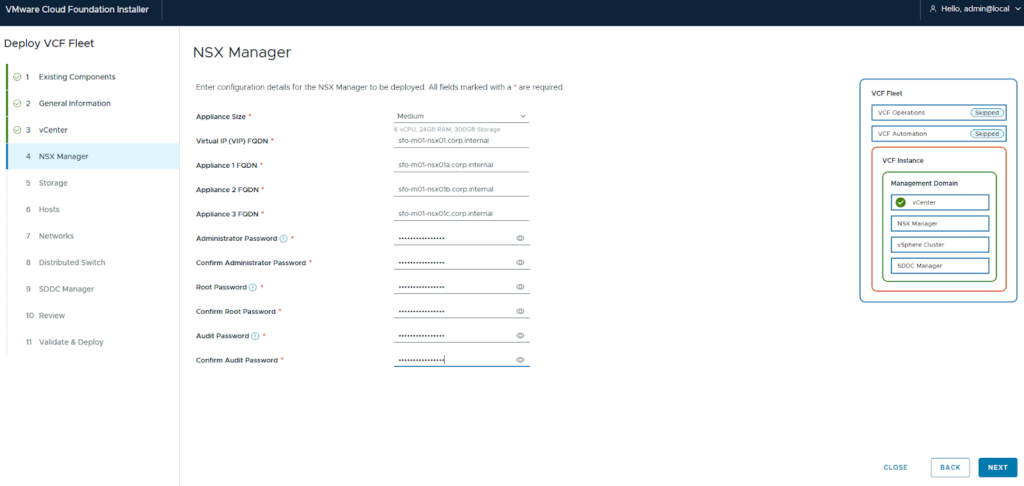
- Enter Credentials:
- Provide the vCenter details and password.
- Provide the NSX information.
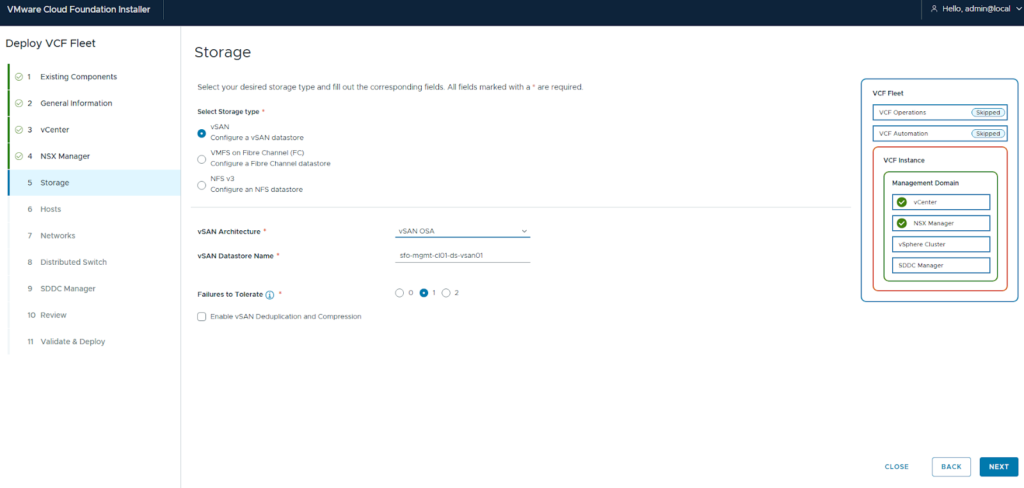
- Storage Configuration:
- Select the Storage type (FC, NFS, or vSAN).
- Enter the storage details. For FC or NFS, ensure at least one datastore is created on all ESX hosts and enter the datastore name here.
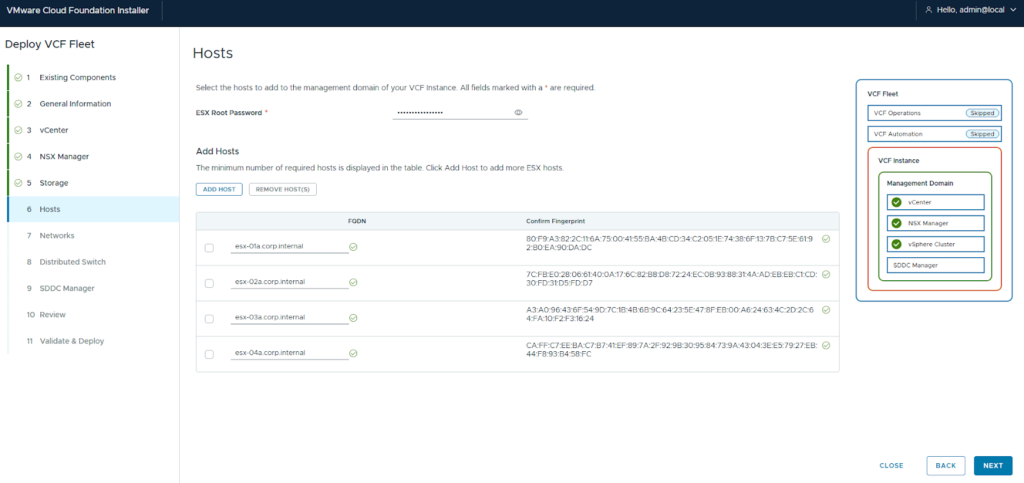
- ESX Host Details: Enter the ESX host details and validate the fingerprint.
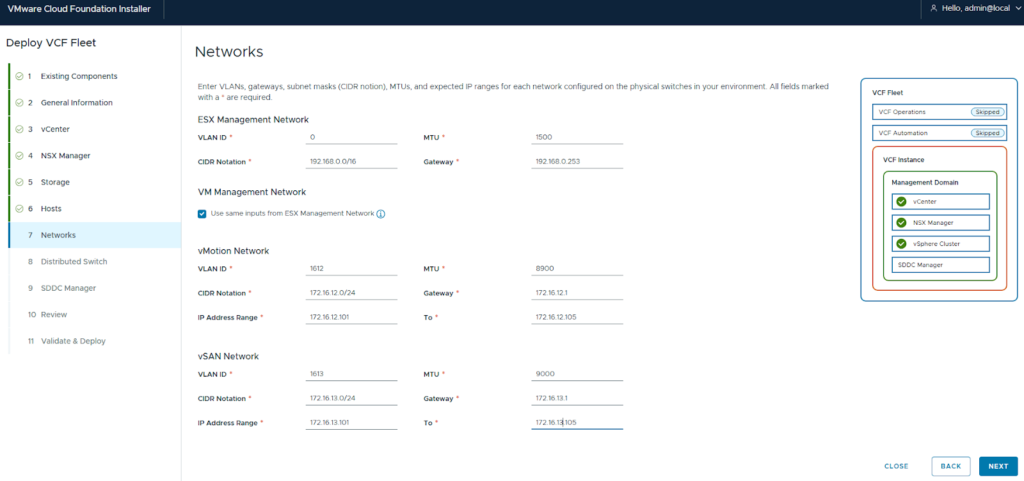
- Network Configuration: Configure the networks for ESX management, VM management, NSX, and vSAN.
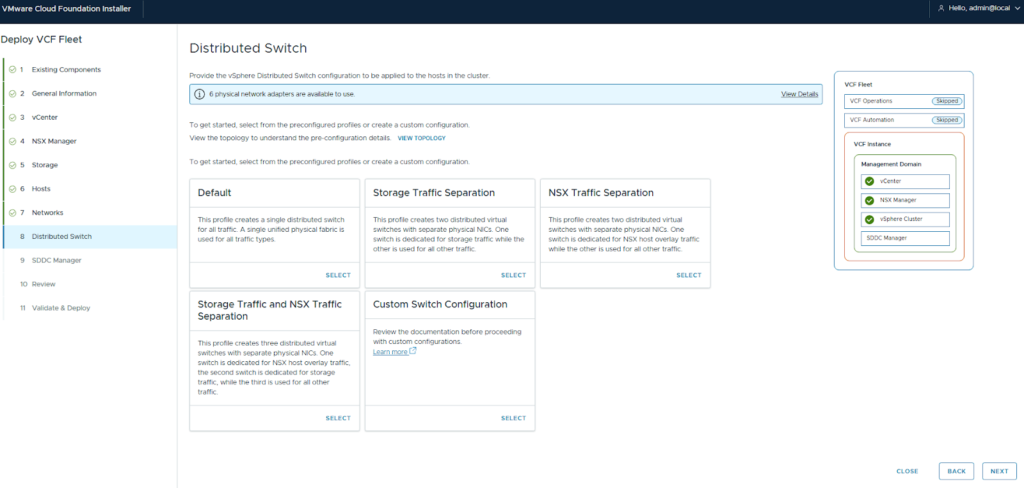
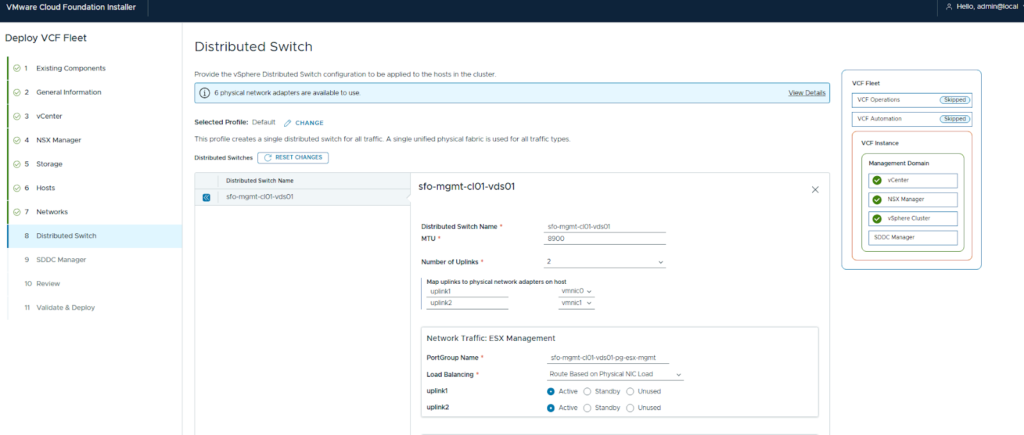
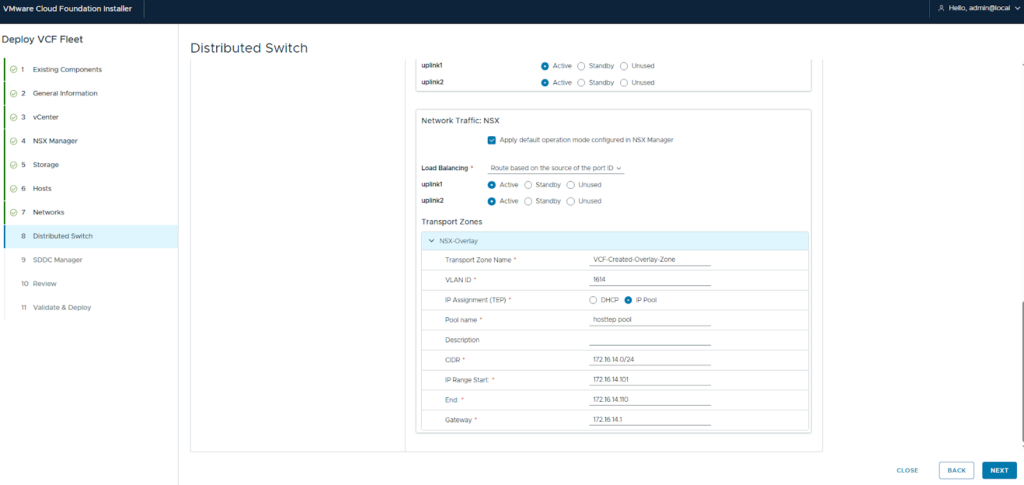
- DVS Configuration: Select the desired DVS model, configure all port group details, and set up the overlay network (as shown in the accompanying screenshot).
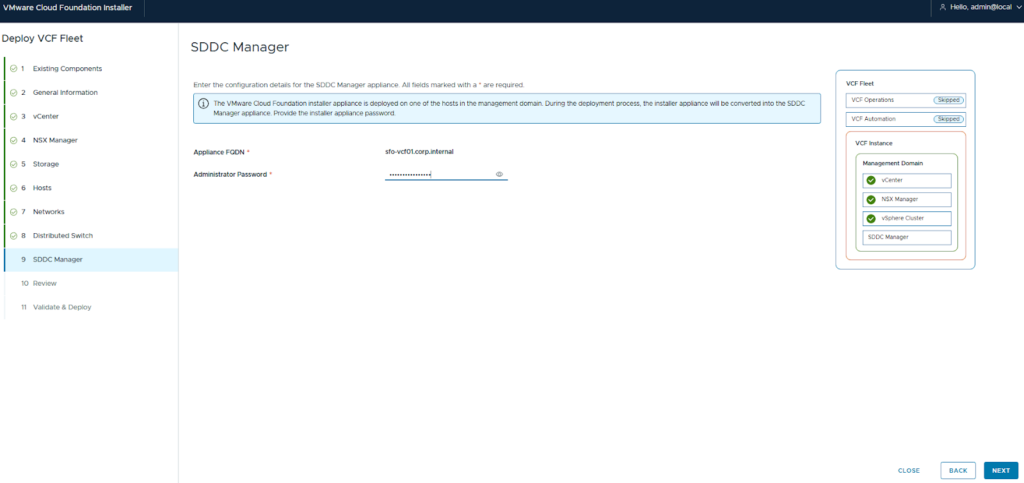
10. SDDC Manager Configuration: Since the VCF Installer or management ESX host was deployed first, it will be converted to the SDDC Manager.
If the VCF Installer is running externally, you will be prompted to enter the SDDC configuration.
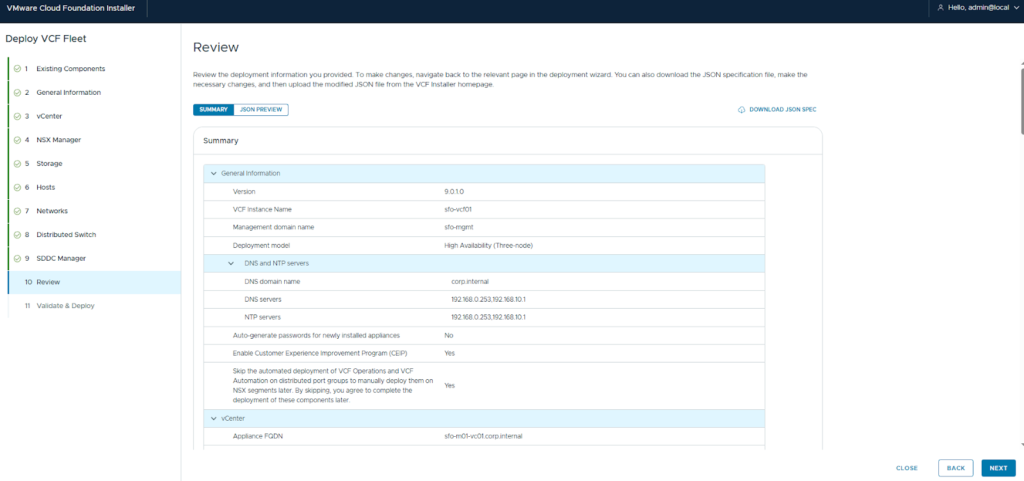
11. Review and Deploy
Review all the details and click next. The JSON specification can also be downloaded for future reference.
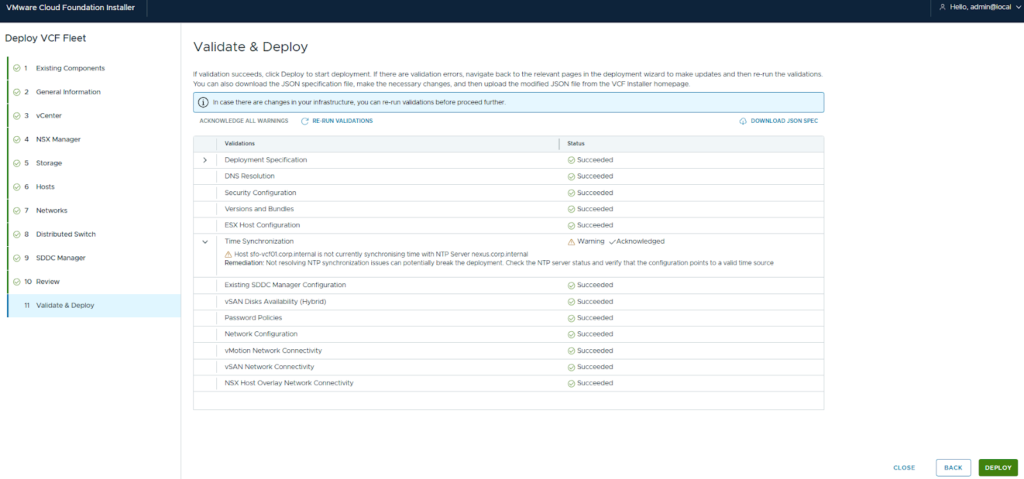
The validation process will run. Any errors must be rectified before proceeding. Warnings can be acknowledged.
Once validation is successfully completed, click Deploy.
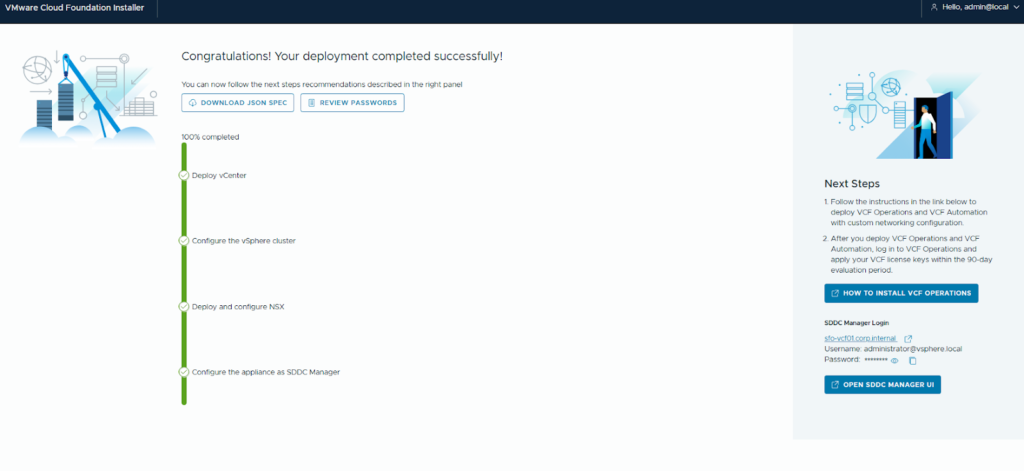
Wohoo! Your deployment has successfully completed!
In the next post, we will cover the Day 2 deployment of fleet components.